Saturday, February 22, 2020

Valentine Day Special: Heart Shaped Doily:
Fig 1
Hello friends,
This is the special shape which we call "Heart Shape" and it's a symbol for heart (love). The history of using this shape for heart goes long back and reaches in India. In Indus Vally Civilization (3300 BC to 1300 BC), "peepal leaves" Ficus religiosa (which are heat shaped) were used to depict heart artistically. The heart shaped pendent of that age was exhibited in Delhi National Musium, India. Till today we are in love of this shape and consider this as a symbol of heart. Hence on Valentine Day many many special things / items are made of this shape every year. This is one of my contribution to that, Heart Shaped Doily. Fig 1.

It is crochet doily pattern simple to make, I made it for my Youtube channel, Kalopasak and many of my subscribers made it with different colors which also looks very beautiful. See fig 2, same doily made by Bhakti.
Fig 2

Pattern: Make ch 4,
R1: dc 3 in the first ch made. ch 3 turn
R2: dc 3 in first st, skip middle sts, dc 4 in last st, ch 3 turn
R3: dc 3 in first st, dc 3 in gap, dc 4 in last st, ch 3 turn. See fig 3. Two gaps formed.
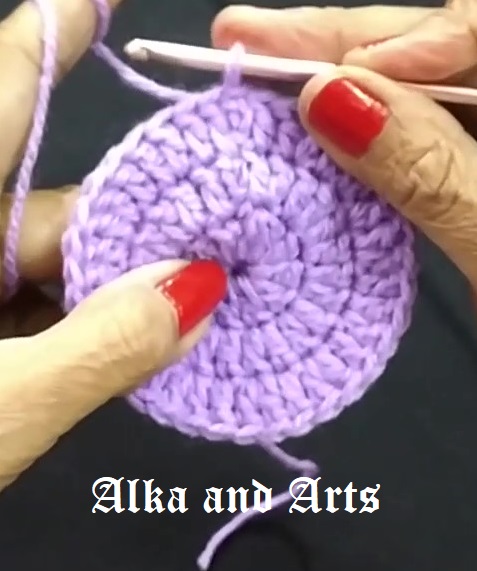
R4: dc 3 in first st, dc 3 in each of the middle two gaps, dc 4 in last st, ch 3 turn. See three gaps are formed, fig 4
R5: dc 3 in first st, dc 3 in each of the middle  gaps, dc 4 in last st, ch 3 turn. See four gaps are formed, fig 5.


Fig 3
Fig 4
Fig 5


R6, R7 .... as row 5. Each time number of gaps will be increased by one. Go on doing this till there will be 17 gaps and 18 groups of double crochets. Place a marker in the centre, that is 9 dc groups on left and 9 on right.
Here onward we work on only one side of the marker.
R1: ch 4 turn, DON'T MAKE DCS IN FIRST ST,  dc 3 in each of the next gap till the marker, tr 1in last gap of marker.
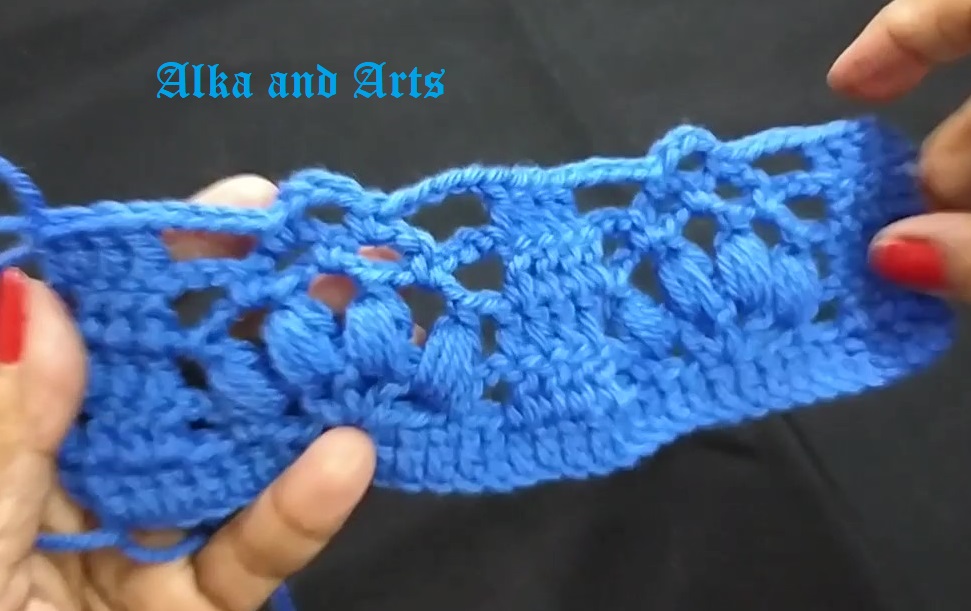
R2: ch 4 turn, dc 3 in each gap tr 1 in last st. See fig 6.
Repeat row 2 till there is only one gap.
ch 4 turn, sl st in that gap, ch 4 sl st in first st, bind off.
Fig 6
Fig 7

Fig 8
Now join the yarn at marker, see fig 7.
Work similarly as first part above.
Then it will be as in fig 8

Border with Green Color:
R1: Join the yarn, ch 4, sc 1 in first dc or ch 3 till the centre (upper deep end).
At the centre don't join at deepmost point skip that and directly join in next ch 3/ dc.
Fig 9
Fig 10
Continue ch 4, sc 1 on other side.
R2: (ch5, sc 1 in ch 4-loop) repeat. Here also skip the deep most point.
R3: (ch6, sc 1 in ch 4-loop) repeat. Here also skip the deep most point.
After 3 rounds of border, it will look as in fig 9.
R4: Last round of border: Half
Fig 11
double crocher (hdc) 4 in each ch 6-gap.At bottom most corner make, hdc 6, ch5-picot, hdc 6. See fig 10. Other side as that of first side.
Flower: R1: Make ring of ch 4, close by sl st.
R2: (Petal: ch 4, tr 3 in ring, ch 4, join by sl st) Make 5 petals in the ring.
See fig 11.
Make such 14 flowers and sew it with a bead at the centre. Keep constant distance in between or sew them as you wish. The beautiful doily fig 1, is ready.
The following video with English subtitles may help you.

ETC: Enjoy the Creativity.


Saturday, February 15, 2020

Ladies Booties with Puff Design
Fig 1
Hi,
In the last post I showed the purple crochet jacket which I made. Here I made matching shoes with that jacket. Not only colour but the design is also similar to jacket design.

Pattern: 
Wool 30 gm, crochet hook 3.5 mm, Length 9”
R1: In a magic loop ch 3, dc 11, close by sl st in third ch. (12 sts)
R2: ch 3, dc 1 in same st, dc 2 in each st, close (24 sts)
R3: ch3, dc 1 in same st, dc 1 in next, (dc 2 in next, dc 1 in next) repeat till end, close (36 sts) Fig 2.
R4: ch 3, dc 1 in each st from next st  till end, close, (36 sts) Fig 3.
R5: ch3, dc 1 in each of the next 7 sts, ch 2, skip 2 sts, dc 1 in next 3 sts, ch 2, skip 2 sts, sc 1 in next, ch 1, skip 2 sts, (dc1, ch1) 3 times in next st, skip 2 sts, sc 1 in next st, ch 2, skip 2 sts, dc 1 in next 3 sts, ch 2 skip 2 sts, dc1 in next 8 sts, close, fig 4.

Fig 2

Fig 3
Fig 4


Fig 5

Fig 6

Fig 7


R6: ch3, dc 1 in 7 sts, ch 2, skip 2 sts, dc 1 in next 3 sts, ch1, (puff1 in next gap, 3 chs) 3 times, puff 1 in next gap, ch 1, dc 3, ch2, skip 2 sts, dc 1 in 8 sts, close. Fig 5
R7: ch3, dc 1 in 7 sts, ch 2, skip 2 sts, dc 1 in next 3 sts, (ch3, sc 1 in next gap) 3 times, ch 3, dc 1 in 3 sts, ch2, skip 2 sts, dc 1 in 8 sts, close. Fig 6.
R8: ch3, dc 1 in 7 sts, ch 2, skip 2 sts, dc 1 in next 3 sts, ch4, skip a ch3 gap, sc 1 in next gap, ch 3, sc 1 in next gap, ch 4, dc 1 in 3 sts, ch2, skip 2 sts, dc 1 in 8 sts, close. Fig 7
Fig 8

Fig 9
Fig 10
R9: ch3, dc 1 in 7 sts, ch 2, skip 2 sts, dc 1 in next 3 sts, ch2, sc 1 in first gap, (ch1, dc 1) 3 times in next gap, ch 2, dc 1 in 3 sts, ch2, skip 2 sts, dc 1 in 8 sts, close. Fig 8.


R10: ch3, dc 1 in 7 sts, ch 2, skip 2 sts, dc 1 in next 3 sts, ch1, (puff1 in next gap, 2 chs) 3 times, puff 1 in next gap, ch 1, dc 3, ch2, skip 2 sts, dc 1 in 8 sts, close, see fig 9.
R11: ch3, dc 1 in 7 sts, ch 2, skip 2 sts, dc 1 in next 3 sts, (dc 1 in gap, dc 1 on edge of puff) 4 times, dc 1 in gap, total 9 dcs in between the pattern, dc 1 on 3 dcs of last row, ch2, skip 2 sts, dc 1 in 8 sts. Bind off. Fig 10
Fig 11

Fig 12
Join the yarn at the end of above 9 dcs on the pattern. See fig 11.
Here onward we work in rows and not in rounds.
R12: ch 3, dc 1 on next 2 sts, ch2, skip 2 sts, dc 1 on 16 sts, ch 2, skip 2 sts, dc 1 on 3 sts, turn
After two more rows looks as  in fig 12.
Repeat row 12 so that the foot is covered. As in fig 13.
Sew on the back of foot. Fig 14

Make one puff flower and sew it to the shoe.
Fig 13

Fig 14

Finally the beautiful matching shoes are ready as in fig 1.


The following video may help you.


ETC: Enjoy the Creativity.


Thursday, February 13, 2020

Crochet Ladies Jacket Part 2
Fig 1
Hello friends,
This post is only for giving the second part of this jacket.

Front Part: For front part we work till the 4 dcs and don’t work 10 sts which are under arm. See fig 2.

In front part there are 2 patterns of design. Work one pattern as it is and in another pattern decrease sts on neck side. For that make 3 puffs instead of 4 then 2 then 1, so that the sts are decreased. Fig 3. One of the front I have already made in order to get an idea of how the neck line sts are decreased. 

R1: (WS) ch 3, dc 1 in 3 sts, first pattern as it is means ch 2, sc 1 in first gap, (ch 1, dc 1) 3 times in next gap, ch 1, sc 1 in next gap, ch 2, dc 4, ch 2, sc 1 in next gap, (ch1, dc 1) 2 times in next gap, ch 1, sc 1 in next gap, ch 2, dc 4.
See fig 4.


Fig 2

Fig 3
 R2: (RS) ch 3, dc 3, ch 1, puff in next 3 gaps separated by ch 3, then ch 1, dc 4, ch 1, puff in next 4 gaps separated by ch 3, ch 1, dc 4. Fig 5.

R3: ch 3, dc 3, (ch 3, sc1 in the gap between 2 puffs) 3 times, ch 3, dc 4, (ch 3, sc 1 in the gap between 2 puffs) 2 times, ch 3, dc 4. Fig 6
Fig 4

Fig 5
 R4: ch 3, dc 3, ch 4, sc1 on previous row sc, ch 3, sc 1 on previous row sc, ch 4, dc 4, ch4, skip one gap, sc 1 in next gap, (ch 3, sc 1 in next gap) 2 times, ch 4, dc 4. Fig 7.


Fig 6

Fig 7
Fig 8


Fig 9

Fig 10
 R5: ch 3, dc 3, ch 2, sc 1 in first gap, (ch 1, dc 1) 3 times in next gap, ch 1, sc 1 in last gap, ch 2, dc 4, ch 2, sc 1 in first gap, (ch 1, dc 1) in next gap, ch 1, sc 1 in next gap, ch 2, dc 4
Fig 11

R6:ch 3, dc 3, ch 1, puff 1 in next gap ch 3, puff 1 in next gap, ch 1, dc4, ch 1, (puff 1 in next gap, ch3) 3 times, puff 1
Fig 12
in next gap, ch 1, dc 4. Fig 8.

R7: ch 3, dc 3, (ch 3, sc1 in the gap between 2 puffs) 3 times, ch 3, dc 4, ch3, sc 1 in gap between 2 puffs, ch 3, dc 4. Fig 9.


Fig 13.
Fig 14
R8: ch3, dc 3, ch 2, sc 1 in a gap, ch 2, sc 1 in a gap, ch
2, dc 4, ch4, skip first gap, sc 1 in next gap, (ch 3, sc 1 in next gap) 2 times, ch 4, dc 4. Fig 10.
R9: ch3, dc 3, ch 2, sc 1 in next gap, (ch1, dc1) 3 times in the next gap, ch 1, sc 1 in next gap, ch2, dc4, ch2, sc 1 on previous sc, ch 1, sc 1 on previous sc, ch 2, dc 4. Fig 11.
R10:  ch 3, dc 3, ch 1, puff1 in next ch1- gap then ch 1, dc 4, ch 1, puff in next 4 gaps separated by 2 chs, ch 1, dc 4. Fig 12.
In this row we make 2 chs in between 2 puffs because in our next row we have to make all dcs, no further puffs.
R11:ch 3, dc 1 in each st, so that in all there should be 23 sts.
R12, R13 and R14 same as R11. Fig 13.
Similarly make other front with proper decrease of sts on neck side. Fig 1
Back: Work same as the pattern (See part 1).
Last 4 rows of all dcs.
Sew both shoulders properly.
Cord: Make chains with double thread as much as you want.
Tassels: Instead of tassels we make Puff flowers which will match the design of the jacket.
Thread the cord through the 4dcs button band and buttonhole band. Sew puff flowers to both ends. I have also sewed two beads at the centre of the puff flowers. Fig 14.

Look, how beautiful the jacket is!!!! Fig 1.

The following video may help you.

ETC: Enjoy the Creativity.

Wednesday, February 12, 2020

Crochet Ladies Jacket
Fig 1
Hi friends,
This is my new creation for me😀. The design on this jacket is little changed version of the design given by,
https://www.youtube.com/watch?v=0XOst4WmVpU&t=971s
When I saw this pattern I loved it and I thought of using it somewhere and here I changed it little bit and used it. I have also made matching booties with this which I will post lateron.
For this jacket I used Baby Bee yarn from Hobby Lobby. I love to make any thing with this yarn, it is such a wonderful yarn thin and smooth. Also I use 3.5 mm crochet hook.

Measurements: Height 23”, Width 17”
Pattern:


Fig 2

Fig 3
Fig 4
Border: Ch 12
R1: sc 1 in each st from second st till last st (11 sts), ch 1 turn, fig 2
R2: sc 1 in back loop of each of the 10 st, sc 1 normally (not in back loop) in last st. (11 sts). After row 3 as in fig 3.
Repeat row 2 till the length becomes 34”. Fig 4. Then bind off.

Fig 5
Ch 3, and make double crochet in each st, one in gap, one on vertical line. Fig 5Total we have 154 sts. We want multiple of 15 plus 4 sts, so adjust sts if necessary.

Sample of the Pattern: For sample we start with 34 + 3 chs.
R1: (RS)dc 1 in each ch starting from 4th ch. Fig 6.
Fig 6

Fig 7
R2: (WS) (Foundation row) ch 3, dc 1 in next 3 sts, [ch 2, skip 2 sts, sc 1 in next st, ch 1, skip 2 sts, (dc1, ch1) 3 times in next st, skip 2 sts, sc 1 in next, ch 2, skip 2 sts, dc 1 in next 4 sts] repeat till end, fig 7.
Fig 8
Fig 9
R3: ch 3, dc 1 in 3 sts, [ch 1, (puff 1 in next gap, ch 3) 4 times, ch 1, dc 1 in 4 dcs of previous row] repeat till end.
Puff: (YO insert hook in st, YO get 2 long sts) 4 times, there are 9 sts on hook, YO and pass through 8 sts, YO pass through remaining 2 sts, 
Fig 10

Fig 11
 ch 1 fix it, fig 8
R4:ch 3, dc 1 in 3 sts, (ch 3, sc 1 in next gap) 3 times, ch 3, dc 1 in each of the 4 dcs of previous row, fig 9.

R5:ch 3, dc 1 in 3 sts, [ch 4, skip first gap, sc 1 in next gap, ch 3, sc 1 in next gap, ch 4, dc 4] repeat. Fig 10

R6: ch 3, dc 1 in 3 sts, [ ch 2, sc 1 in ch 4-gap, ch 1, (dc1, ch1) 3 times in ch3-gap, sc 1 in ch4-gap, ch 2, dc 4] repeat …This is just like our Foundation row above. Fig 11.

Now repeat rows 3 to 6 as much as the length required. Here we make 16”.

Then work till marker for arm hole and then work all dcs on the puffs at under arm place (there will be 11 dcs as under arm, 2 dcs in each gap and 1 dc on each puff edge). The next part again as per pattern till the second under arm position, here also we work 11 dcs then remaining part again as it is.
Next row as per pattern only at both underarms position (instead of 11 dcs) work 5dcs, 2 dctog, 4 dcs, remaining again as it is.

In further work we shall not work these 10 sts under arm.
The following video may help you.

Remaining part of the jacket in next post.
ETC: Enjoy the Creativity.

Crochet Cap for Baby with Neck Warmer for Beginners

  Hello friends, Here is a very simple baby cap specially made for beginners.  This cap is for 6-9 month with circumference of head 13.5&quo...