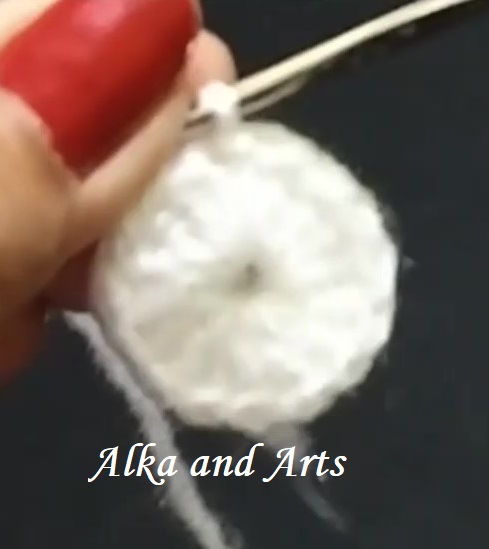
This is another part in this basket, Garlic.
Pattern:
Always place marker in the first st of each round. With white yarn,
R1: In a magic loop make, ch1, sc6, close the loop,. (6 sts)
R2: sc2 in each st, (12 sts)
R3: (sc1 in 1 st, sc2 in next st) rep (18 sts)
R4: (sc1 in 2 st, sc2 in next st) rep (24 sts)
R5: (sc1 in 3 st, sc2 in next st) rep (30 sts)
R6: (sc1 in 4 st, sc2 in next st) rep (36 sts)
R7 to R12: sc 1 in each st, (36 sts)
R13: (sc1 in 4 sts, 2sctog) rep (30 sts)
R14: (sc 1 in 3 sts, 2sctog) rep (24 sts)
R15: (sc1 in 2 sts, 2sctog) rep, (18 sts)
R16: (sc1 in 1 st, 2sctog) rep, (12 sts)
Fill fiber inside.
R17: 2sctog throughout, (6 sts)
R18 to R21: sc 1 in each st (6sts). Bind off with long yarn end.
Then thread in tapestry needle and (pass through bottom and pull tightly, then insert at top) repeat this 5-6 times
With green yarn, make ch15. sl st in each st from second.Fold in the mid to get two small leaves.
Make a knot at centre with white yarn and insert in 6sc ring-space. Fix the yarn and leaves.
Roots: Wrap blackish yellow yarn aroun 4-5 inches 4-5 times, remove and make a knot at the centre.
Now in a magic loop make R1: ch1, sc6
and R2: sc2 in each st, BO.
Now place the above knot below this small ring and take one by one loop out through each st of second round.
Sew this at the bottom of the Garlic.
The following video with English subtitles may help you.
ETC: Enjoy the Creativity.
Hello friends,
This is the second vegetable I made for my Vegetable Basket. CARROT.
For this I used 4 ply yarn and 3.5 mm crochet hook. Also I need fiber for stuffing.
Pattern:
Always place marker in the first st of each round.
R1: In a magic loop make, ch1, sc6, close the loop,. (6 sts)
R2: sc2 in each st, (12 sts)
R3: (sc1 in 1 st, sc2 in next st) rep (18 sts)
R4: (sc1 in 2 st, sc2 in next st) rep (24 sts)
R5 to R8: sc 1 in each st, (24 sts).
R9: (sc1 in 10 sts, sc2 in next) 2 times, (22 sts)
R10 and R11: sc 1 in each st, (22 sts)
R12: (sc1 in 9 sts, 2sctog) 2 times, (20 sts)
R13 and R14: sc1 in each st (20 sts)
R15: (sc1 in 8 sts, 2sctog) 2 times, (18 sts)
R16 and R17: sc1 in each st (18 sts)
R18: (sc 1 in 7 sts, 2 sctog) 2 times (16 sts)
R19 and R20: sc 1 in each st. (16 sts)
R21: (sc 1 in 6 sts, 2 sctog) 2 times (14 sts)
R22 and R23: sc 1 in each st. (14 sts)
R24: (sc 1 in 5 sts, 2 sctog) 2 times (12 sts)
R25 and R26: sc 1 in each st. (12 sts)
Stuff the fiber.
R27: (sc1 in 4 sts, 2sctog) 2 times (10 sts)
R28 and R29: sc 1 in each st. (10 sts)
R30: (sc 1 in 3 sts, 2 sctog) 2 times (8sts)
R31 and R32: sc 1 in each st (8sts)
R33: (sc 1 in 2 sts, 2sctog) 2 times (6sts)
Bind off.
For leaves: Make (ch7, sl st in 3 chs from second, repeat this 2 times), sl st down the main 25 chs for 3 chs and repeat from ( to ).
Make such 3 leaves and sew them on the top of the carrot.
The following video with English subtitles may help you.
ETC: Enjoy the Creativity.
Hello friends,
How are you all, hope good. Now a days Health good means every thing good. On the background of Corona virus we can say that the secrete of good health is eating healthy food, exercise and stay at home. In healthy Indian food means eating all types of vegetables and fruits as per season. So I spend my last 10 days in making these crochet vegetables. You can try making them for Home Decor or for Gifting some one, specially kids.
I also feel that this is a best gift for primary of Kinder Garden schools because that is the place where different vegetables are introduced to the kids. So to imagine their shapes, sizes and colours these crochet vegetables will help them. When I made this Potato, continuously I am whispering the song heard by my grandson," One potato, two potato .......".
The Vegetable basket contains Potato, Carrot, Egg plant, Spinach, Cabbage, Bhendi, Beatroot, Garlic, Onion, Chilli, Lemon and Pepper (Simla Mirchi).
So here we see the pattern of POTATO.
For potato we use 4 ply yarn and 3.5 mm crochet hook.
R1: In a magic loop make sc8, DON'T CLOSE, Place marker at the first st of every round.
R2: sc2 in each st, (16 sts).
R3: (sc1 in 1 st, sc2 in next st) rep, (24 sts).
R4: and R5: sc 1 in each st, (24 sts)
R6: (sc1 in 2 sts, sc2 in next) rep, (32 sts).
R7 to R16: (10 rounds) sc 1 in each st, (32 sts)
R17: (sc 1 in 2 sts, 2sctog) rep, (24 sts)
R18: R19: sc1 in each st (24 sts)
R20: (sc1 in 1 sts, 2sctog in next) rep, (16 sts)
Fill the fiber.
R21: 2sctog throughout. (8 sts).
Close by tapestry needle keeping 7-8 inches yarn end and bind off.
Thread the yarn in tapestry needle insert at centre and take out side somewhere,insert close by and pull the yarn to make a small lump.
Make such 3-4 lumps on potato.
Here is the Potato ready.
The following video with English subtitles may help you.
ETC: Enjoy the Creativity.
Hello friends,
After one month as per Lunisolar calender, there will be first month of new year "Chaitra" and its first day is known as Gudhi-padava. It is celebrated as a festival in Maharashtra. In the same month there occures "Ram Navami", birth of God Ram. In many Indian families they put the door hanging written the name of the some God so that when you entre hom, atomatically you read that and remember the God.
So many subscribers of my youtube channels requested me to make such door hanging with the name of God Ram. So I made this for them.
Here is the pattern:
Note:
1. Y means yellow, R means Red.
2. Complete Toran patti is in double crochet so instead of writing 5dc by yellow and 3 dc by red, we only write 5Y, 3R
3. First dc means always ch3.
4. After each row sts will be 27.
5. Carry the other colour
6. Row 8 is corrected that that in video.
Pattern:
Make Chs 26+3 by Y.
Row1: (Right Side) dc 1 in each ch starting from 4th ch (27 sts), ch3 turn
Row2: (Wrong Side) dc1 in each st,
Row3: (RS) 6Y, 15R, 6Y,
Row4: (WS) All Y
Now again we have to write राम which starts from row 19 that is odd row and here also our next row 45 is odd. So repeat rows 19 to 33 as they are to write राम and जय. Those will be row 45 to Row 57.
Then next जय will start from row 58 means even row where as above Jay also starts from even row 32. So repeat rows 32 to 44. Next thirteen rows means Row 58 to 70.
Next we have to write again जय which is going to start from Row 71 which is odd row where as in above pattern जय starts from even row 32, so repeat each row from 32 to 44 but in reverse order. Means Row 71 will be reverse of R32 that is,
9Y, 6R, 4Y, 2R, 6Y and so on……
Rows will be Row71 to Row83.
Now we have to write last word राम which starts from R 84 means even so repeat from R19 to R31 in reverse order as explained above. That is R84 will be reverse of R19 means,
6Y, 2R, 3Y, 8R, 8Y
They will be R84 to Row 96.
Lastly repeat rows 2 to 7.
Row102 will be the last row.
Border: Join red yarn at corner st, make dc3 at corner st, again dc3 in same st (at corner make two times dc3), skip 2 sts, make dc3 in next st (along small side there are sts), repeat till other corner. Then along long side there are dcs or ch3, so skip one dc part and make dc 3 in next....
Now we make swastik piece:Make chs 17+1.
Row1: sc1 in each st.
Row2: Y1, R9, Y3, R3, Y1
Row3: Y1, R3, Y3, R3,Y7
Row4: Y1,R15,Y1
Row5: Y7, R3,Y3, R3, Y1
Row6: Y1, R3, Y3, R9, Y1, ch1
Row7: (hdc1 in each of 17 sts, hdc2 at corner) rep.
Make 12 such pieces and join them by red yarn as shown.(sc1, ch2) along 4 sides of each piece and sc 2 at corner of each. Then make ch 15 vertically to join and chs 17 horizontally to join another swastik piece.
Then join 15 beads diagonally.
You can also make different design to join these pieces as per your choice.
The following video with English subtitles may help you.
ETC: Enjoy the Creativity.
Hello friends, how are you all?
Here I made this crochet doily with three colours white, pink and green which is matching to the door hanging I have posted previously.
Yarn used is 4 ply and crochet hook 1.75 mm.
Pattern:
With white yarn,
R1: In a magic loop make dc16, cl (16 sts).
R2: (ch1, sl st in the front loop of next st) rep till end, lastly get the st back.
R3: dc2 in each st on back side, cl (32 sts).
R4: Same as R2. Bind off, join pink yarn.
R5: sc1 in each st on back side, cl (32 sts).
R6: [ch12, from second ch make, sl st 1, sc 1, hdc 2, dc 3, hdc2, sc 1, sl st 1 (11 sts worked) then on other side of same ch12 work, sl1, sc 1, hdc2, dc3, hdc2, sc1, sl st1,
on first side make sl st on each of the 11 sts, skip 1 st, join by sl st in next, (one petal made)
ch7, then ch5 make a loop of these ch5, ch7, skip 1 st and join in the next by sl st]
rep this throughout the round and cl. Eight petals made.
BO and join green yarn at the edge st of any petal.
R7: (ch7, tr1 in next ch5-loop, ch7, sl st in next petal’s edge st) rep till end, cl. (16 ch7-spaces formed).
R8: 8dcs in each ch7-sp, cl (128 sts).
R9: [ch12, from second ch make, sl st 1, sc 1, hdc 2, dc 3, hdc2, sc 1, sl st 1 (11 sts worked) then on other side of same ch12 work, sl1, sc 1, hdc2, dc3, hdc2, sc1, sl st1, on first side make sl st on each of the 11 sts, skip 1 st, join by sl st in next, (one petal made), sl st in 2 sts, ch7, then ch5 make a loop of these ch5, ch7, skip 2 st and join in the next by sl st] rep this throughout the round and cl. Sixteen petals made.
BO and join Pink yarn at the edge st of any petal.
R10: (ch6, tr1 at next ch5-loop, ch6, sc 1 at next petal’s edge st) rep throughout the round, cl. (192 sts).
R11: dc7 in each ch6-sp, cl.
R12: as Round 2 that is, (ch1, sl st in the front loop of next st) rep, cl. BO join white yarn.
R13: dc1 in each back side st, cl.
R14: as round 12. BO.
Sew small pom pom at equal distance of petal edge.
The beautiful doily is ready as in first figure.
The following video with English subtitles may help you.
ETC: Enjoy the Creativity.