
Generally when we invite any one for lunch or dinner, we decorate our dinning area means dinning table and near by. In Indian culture Paat (wooden sitting device) are arranged and people sit on them and take their lunch or dinner. Many times dinning plate is also placed on these paat. Now a days most of the people use Dinning Table still occassionally or for functions this type of arrangement is made.
This was the beautiful Dinning arrangement made in my daughter's marriage.


So the traditional way of decorating the dinning area is drawing beautiful and colourful Rangolies around the plate and also around the Paat.
At that time we have placed Beads Rangolis around the lunch plate which are made by my mother. I have shown it in my post,
https://alkaandart.blogspot.com/search?q=mom%27s+creation
Other than dinner arrangements the main use of Square Paat (Chourang) is in many rituals and every time Rangoli has to be made around Chourang.

Now a days we don't have much time to draw the rangoli and colour it so if we get instant rangoli then it will be so far so good. Hence I made three crochet Rangolies around Paat / Chourang in last two weeks. I have already made the rangolies around plates (which is called Meherap), here is it's link on my blog,
https://alkaandart.blogspot.com/search?q=meherap
Now for those we don't have this use of Rangoli around paat, can use it as a best Lace Design which you may use for baby frock with rectangular neck or Towel border or Curtain border etc.
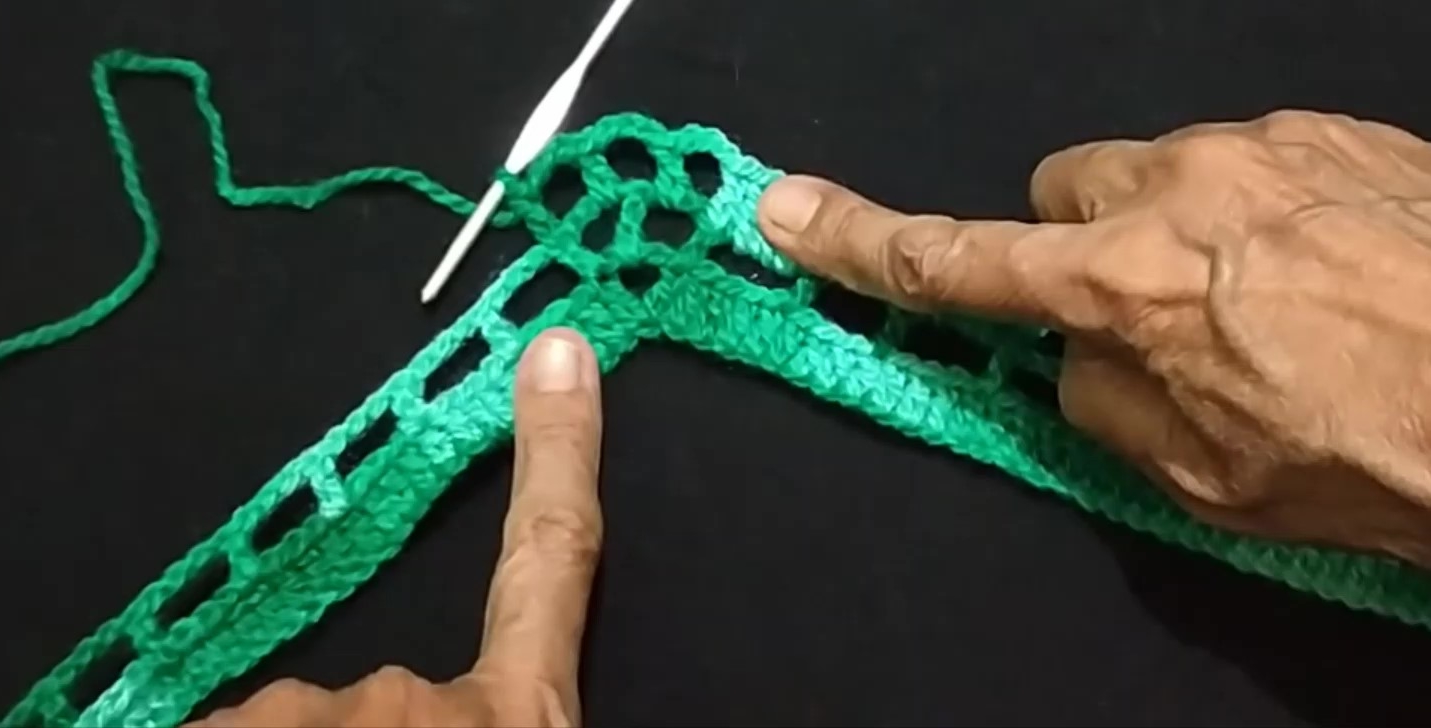
Pattern: Rangoli Around Paat Design 1
Measurement of the Paat around which we are making Rangolil is 18" x 12".
Yarn Orange and Green, 4 ply and hook 3.5 mm
We want multiple of 16+4 sts for the design. Start with Green yarn.
For 12” we need 52 chs, for 18” we need 84 chs again for 12” we take 52 chs. That is 188 chs, plus ch2 for corner means 190 chs. Make ch3 as first dc.
R1: dc1 in each ch starting from 4th ch till there are 52 dcs, then (dc1, ch3, dc1) in next ch, dc 1 in next 84 sts, (dc1, ch3, dc1) in next, dc1 in last 52 sts.
Note that first dc means ch3.

R2: [(dc1, ch3, skip 3 sts) rep till corner, at corner dc on dc-st, ch2, dc1 in ch3-sp, ch2, dc on dc-st] 2 times, [(dc1, ch3, skip 3 sts) rep till end.


R3: dc1,[ (dc3 in ch3-sp, dc 1 on next dc, ch3 skip this window, dc 1 on next dc-st) rep till corner, at corner, (ch3, dc1 in ch2-sp) twice, ch3] twice, (dc3 in ch3-sp, dc 1 on next dc, ch3 skip this window, dc 1 on next dc-st) rep till end. BO.


In a magic loop make dc 16,with white, attach green tassels at three times on one side. Make two such pieces.


Make sc 6 in a magic loop, cl. Make two one with yellow and other with red as Haldi Kumkum which we used to place on any rangoli.
Sew these two pieces on two white tassels. Lastly sew them at two corners of our Rangoli.

The following video with English subtitles may help you.
ETC: Enjoy the Creativity.


No comments:
Post a Comment