Sunday, February 25, 2018

Saree / Dress Packing or Wrapping:
Fig 1
Gift packing or wrapping is an art of enclosing a gift by some material which is generally colored paper to wrap and on that ornamental knot by ribbon. When we wrap a gift, it gives value addition in your present, it gives personal touch to your gift, it gives positivity to the recipient when he / she receives it and finally it is a beautiful love symbol between you and the recipient of the gift. In addition to this, it gives an opportunity to the creative person to decorate the packing in number of different ways.
Some people think that wrapping a gift is a waste of time and waste of material used because everyone is interested in the inside gift and for that wrapping is going to be teared. But I don't think so only that it should not cost much. 
Fig 2
The culture of wrapping the gift is not a new fad or new idea. It's old. In old days gifts are covered by beautiful cloths or handkerchief with embroidery on that. There is one proverb in Hindi (our National Language) "एक नूर आदमी दस नूर कपडा"  meaning if a person counts one then his / her dress counts ten. Similarly we can say, "good packing increases the beauty of the saree / dress ten times".

Particularly marriage gifts are packed in a very decorative manners. In the marriages of my son and daughter I have made several and variety of gift packings. Though all photos are not with me today but some photos are here.
Fig 3

Fig 4
Fig 5
Fig 6

For wrapping I generally use beautiful printed papers and Adhesive tape.
Particularly when the packed item is saree I don't want to stretch the eagerness of a lady about the saree so I pack it in a special manner so that glimpse of the saree and its accessories can be seen even after packing 😛. 
Packing Method: 
In saree shop number of saree boxes are available. Two sarees can be packed in one saree box. First half part of the saree box is taken, it is wrapped by colored paper from outside only and  fixed by adhesive tape as in the photo 7 and 8. (Sorry for the photos because I have just used the paper which is at home hence it is not well pressed) Fig 9 shows the back sides of the packing box after wrapping colored paper. Then keep saree along with blouse piece, matching bangels, matching purse, matching handkerchief (what ever accessories you want to give) as in fig 10. Then fix a transparent colorless gelatin paper above it and wrap from all the sides and fixed by adhesive tape on the back side (please see the above photos). All the things inside (accessories) are packed and do not move. 
Now decorate it as you wish. For marriage packing I generally use tissue ribbon of golden color for decorating.

Fig 7
Fig 8

Fig 9
Fig 10

For decorating it, you can use sateen ribbon its bow, flowers etc. Just as in Fig 1, I have made two
flowers, one of golden ribbon and another from red sateen ribbon (matching with the inner saree), similarly in fig 2 and 5 where as in fig 4 saree packing I have used the white flower from an old bunch of flowers in flower pot. In fig 3 narrow ribbon is used with double strips. In fig 6 small roses are made again by folding ribbon. 
If it is dress material of gent's dress then I think that packing should be same but decoration of packing should be simple, just narrow ribbon and small rose flower on that as in fig 6.

But today we think of environment, hence to avoid unnecessary use of papers we should think of reusable papers and things for decorating the gift.  
Fig 11
Fig 12


Generally I prefer used waste material for decorating for example, broken jewelry, broken part of show pieces (as flowers are used above). 
We can also make flowers of fabric, ribbon etc. Many such flowers can be seen on you-tubes. 
The pink fabric flower is based on the flower demonstrated in the link,
https://www.youtube.com/watch?v=Gi4yI3zFTKs

Those ribbon flowers are also simple.

This beaded flower is also a part of old Toran, (Piece that is attached to the upper portion of the door in India). There are such six flowers in that toran. After that toran is fed up, I remove this bead flower part and use it to gift packing. 
Most right side pink color flower is as per 
https://www.youtube.com/watch?v=iCwOzNNxNYk

Some times I see some crocheted flowers, leaves on internet while surfing and I cannot resist myself from doing it,then where to use it? Of course for packing purpose. Similarly tatted laces are made to decorate the packing but as tatting takes much time I avoid that and use crochet instead.                                 
Fig 14
I found these beautiful flowers on You tube, I made them and now I will use them in some gift packing. Here are the links,
https://www.youtube.com/watch?v=htSAyyxCvHQ&t=628s 

https://www.youtube.com/watch?v=M6-WfMraV3U

https://www.youtube.com/watch?v=HUYRV5V_79w

Thus number of crochet flowers and leaves can be made in leisure time which can be used in packing and they can be reused. See below fig 15,16 and 17.


Sunday, February 18, 2018

Knitted Fur Jacket 6

Fur Jacket: 

Hi friends,
This is again a different type of wool I saw in Samrat, shop at Pune. I even didn't know how to knit with this? still I bought them as I love their texture and colors too.
When I think to experiment with the new yarn, I CO 10 sts with 5 mm needle. Work all rows knit and what a wonder it looks good! Moreover the sts are so invisible, whether you knit or purl, it cannot be recognized. But it looks great!
Yes! I decided to work simple jacket.


Considering the thickness of the yarn, I know that the number of stitches to be cast on should be much less than usual.  So first I check the gauge and then decided the number of stitches to be cast on.

Size of the jacket: length 15", width 13" and arm hole 6".
Material: Golden color yarn 100 gm, knitting needle 5 mm, tapestry needle, 2 show buttons with 1" diameter
Gauge: 12 sts x 12 rows makes 4" x 4"
Instructions: 
Back side: CO 36 sts
(WS) all knit
(RS) all knit
Next row is WS to recognize RS put a plastic pin on RS.                  Work all knit on both RS and WS till the height is 9"

Bind off 3 sts at the starting of Rs and WS both then bind off 1 st      again on both RS and WS. Now there are 28 sts.
Go on knitting both sides till the height is 14.5".
Work only 10 sts for shoulder for 2 rows. Keep these sts on holder. Bind off middle 8 sts. Then again work two rows of remaining 10 sts for other shoulder put them on other holder.
Right front: CO 21 sts.
(WS) all knit
(RS) all knit. Put a plastic pin on RS.
                                                 Knit all rows till the height is 9". Bind off 3 - 1 sts on WS.
Also decrease 1 st by k2tog on alternate RS till 10 sts remain. Keep them on holder.

Left side: CO 21 sts
WS: all knit
RS: YO k2tog, (for button hole) all knit. Put a plastic pin on RS.
Knit all rows with two more times YO k2tog for button hole after every 4.5". When the height is 9", bind off 3 - 1 sts on RS. Also decrease 1 st by k2tog on alternate WS till 10 sts remain. Keep them on holder.
Knit shoulders og front and back side properly with third needle method.
Sew three buttons with 1" diameter.
Jackets I have made in two more colors and size.

Saturday, February 10, 2018

Handkerchief with Symbol of Love: (Valentine Day special)


Hi friends,
Coming week brings Valentine day which is popular all over the world. Every one is busy for purchasing gifts for his / her beloved. Heart and flowers are mainly used for the gifts on this day. In last 5-6 years it is also celebrated  in India but many groups of people oppose it every year. I think instead of romantic love if we consider it in a broader sense then there should be no problem. 

There is very famous poem in Marathi (my mother-tong) by our great literary Kusumagraj, (V V Shirwadkar),

प्रेम कुणावर करावं ?
कुणावरही करावं....


Means,
Whom we should love?
Love any one.......

and then poet describes different persons, characters some beautiful even some not and still suggest to love all that.

In the last two lines while explaining that why we should love, he says.... 

प्रेम कुणावरही करावं
कारण प्रेम आहे
माणसाच्या संस्कॄतीचा सारांश 

त्याच्या इतिहासाचा निष्कर्ष आणि 
भविष्यकालातील त्याच्या अभ्युदयाची आशा
एकमेव ….. !


Love any one because, 
love is the summary of culture, 
conclusion of history and 
the only hope of arising future of mankind.

The poem gives the most broader and deep meaning of love. In short we should love every creation of God.

On this platform we all are lovers of art and creativity. 
We want to create new things and Valentine Day is one of the occasion for us.
So I have created this pink handkerchief with tatted heart in 2010 for my daughter in law to express our love for her.
                                                     
Material: One handkerchief with picot done on all borders, Anchor thread number 20 Maroon color, sewing needle and matching thread if available or you can sew with the same tatting thread also, Shuttle and scissor.
Last but not least lots of love for whom you are making this 💓💓


Instructions:
Fill the maroon tatting thread in a shuttle.
Start with R of 4-4-4-4, R of 4 join with the picot of previous R, 2-2-2-2-4 close.
Work R of 4, join with the last picot of previous R, 4-4-4 close.
Chain of 6-6.
R of 4 join with the last picot of the third ring, 4-4-4 close.
Note that all rings are 4-4-4-4 except two middle rings.
Lower five chains are 4-4, then two chains are 5-5 and last two 6-6.
When you arrive to the lower center, work one more ring with 3-3-3-3-3-3 close.
Similarly work other part.


Wednesday, February 7, 2018

Knitted Princess Jacket 5

Princess Jacket: 
Fig 1
Hi friends,
It was a good thing that pick up point of our Kerala Kanya kumari trip    (as I have mentioned in the last post) was Pune. Pune is such a wonderful city in every aspect; education, culture, arts etc. I always like shopping there. Shopping of anything right from saree, dresses to wool, tatting yarn, beads and  many other material useful for any art. Since last 4-5 years, it never happened that I visited Pune and not visited the shop Samrat which my sister, Sandhya had introduced me seeing my love for creativity. Many things that are not available in Amravati can be purchased there. 
This time I found a different yarn which looked like fur. 

The yarn I found in Pune

Delicate thread

I picked up pink color, I saw the delicate thread which gave fur type look to the yarn in totality. I was in love with that. I didn't know, what I am going to do with this yarn but I purchased it.
After returning home and spending 3-4 days in cleaning and all, I thought about making a jacket with this yarn and here is the result. Waah! a lovely jacket! which I called Princess Jacket. Because that pink fur border is just value addition to the jacket.

Material required: 50 gm off white Vardhamaan 4 ply wool, this above referred pink color yarn, tapestry needle, same pink colored embroidery thread, knitting needle 4 mm, two press buttons and two show buttons.

Final size: Length 14", width 24", arm hole 6". Fits 1-2 years baby.

Gauge: 15 sts and 20 rows makes 3" x 3"

Instructions: Jacket is made in three parts.
Right front: Cast on 30 sts with off white yarn.
Row 1: (WS) All purl
Row 2: (RS) all knit
Row 3: all purl
Row 4: all knit
Row 5: (WS) Join pink yarn and I worked all purl as it is wrong side but then I saw that all fur threads goes to back side hence I tink the row and knit all sts (Remember on WS)
Row 6: (RS) Purl all sts by pink color
Row 7: All knit
Row 8: All purl
WS
Row 9: With off white yarn work stockinette stitch till the length is 7.5". (Approximately  after completing 50 rows)
Bind off 3-2-1 at the starting of each WS, continue stockinette stitch. After two more rows bind of 1 st at the starting of RS. Repeat this till 18 sts remain for shoulder.
Total length is 14".


RS

Left Front: CO 30 sts Repeat as in right front till 7.5".
Then bind off 3-2-1 on each RS. Continue stockinette stitch. After two more rows bind of 1 st at the starting of WS. Repeat this till 18 sts remain for shoulder.

Back side: CO 65 sts with off white color. Till the height is 7.5" work same as left or right front.
Bind off 3-2-1 sts on each of right and wrong side.
Work stockinette stitch till the height is 13". Work only 18 sts for two more rows. Shift them on one holder. Bind off next 17 sts. Again work next 18 stitch  for two more rows and then shift them on another holder.
Facing RS of both left front shoulder and back shoulder bind off 18 sts of  using third needle.
Similarly bind off 18 sts of other shoulder.
Now for the border of armholes, I pick up 60 sts and work stockinette st for 4 rows, but then what I saw is that fur part is toward the neck which I don't like. So I again tink that and separately knit two pink borders for two arm holes with 60 sts and 4 rows then sew them.

I change this border
Border for arm hole.
Then make button band / neckband.
CO 5 sts with off white.
Row 1: All purl, Row 2: All knit, Row 3: With pink yarn knit all, Row 4: Purl all
Repeat rows 3 and 4 till the height is approximately 16".
Make such two bands, if necessary make two holes for buttons. I have sewed two press buttons and these two are only show buttons.
Now sew those bands and the sides.
Your princess jacket is ready! 
Before I got those two beautiful buttons shown in first figure, I have made one bow for tying as follows.
Join off white yarn at the beginning of the neck shape. Work 3dc tog in one stitch on back side of the pink neck band. Then chains 70, also make small tassel and join at the end. Make one more tying cord on other side of the neck band.
3 dc tog and then chains
Tassels & bow also look beautiful!
Is it not great! It only takes two days to finish, so this may be your next weekend project.

Friday, February 2, 2018

Knitted Baby Set 4

Baby Sweater, Pant, Booties and Hat:


Hi friends,
Here is one more baby set I have knitted for my grand daughter.  I never  knitted Pant, so in this set I decided to knit that.
Sweater:
Material: Vardhman yarn bottle green and light yellow color, knitting needle no UK 11 and 10.
Size: For one yer baby
Gauge: 24 st and 28  rows makes 3"x 3"
                                                       
Ribbing: Row 1:(p 1, yarn on back side sl 1, yarn on front side) repeat through out the row.
Row 2: All p

Instruction: This sweater is knitted from top to bottom with wrangler cut.
CO 74 sts on no 11 needle with bottle green color.
Work on ribbing for 8 rows.
Shift sts to no 10 needle and work stockinette stitch with light yellow color.
Note that we have to knit first 5 sts and last 5 sts as per ribbing pattern.
Now divide 74 sts and add marker as follow, (5+12+9+23+9+11+5)
Row 1: 5 sts ribbing for button band, k 11 sts for left front  YO, k1, add marker, YO, k 8, for sleeve, YO,  k 1, add marker, YO, k 22 for back side, YO, k 1, add marker, YO, k 8 for sleeve, YO, k 1, add marker,  YO, k 11 for right front and 5 sts as per ribbing. (total sts 82) (5+13+11+25+11+12+5)

Row 2: All purl.
Row 3: 5 sts ribbing for button band, k 12 sts for left front  YO, k1, move marker, YO,  k 10, YO,  k 1, move marker,  YO, k 24, YO, k1, move marker,  YO, k 10 for sleeve, YO, k 1, move marker, YO, k 12 for right front and 5 sts as per ribbing. (total sts 90) (5+14+13+27+13+13+5).
Row 4: All purl
For row 5 change the color of the yarn. Repeat this after every 4 rows.

Thus go on increasing 8 sts in each odd row.
Repeat rows 3 and 4 thirty times more. Last number of sts will be 210 and distribution will be (5+29+43+57+43+28+5).
Now take one st among the sleeve's 43 in back side and one st from the 43 sts of sleeves in right half side. Thus now you have 42 sts for sleeves, take on st holder and remaining (5 button band + 29 left side + 58 back side + 29 from right side + 5 button band) 126 sts and 84 from two sleeves thus 210 sts intact.
Now work stockinette sts till the required length; again changing the yarn color after every 4 rows. I have worked 56 rows more.
Lastly with bottle green color work ribbing for 10 rows with 11 no needle and bind off.

Now take the 42 sts of the sleeve on needle and again work stockinette sts till the required length. Remember that you have to decrease 1 st after 8 rows and change the yarn color after every 4 rows. After the length of the sleeve is sufficient work ribbing for 10 rows on 11 no needle.

This sweater I have knitted with my own design but pant, hat and booties from different free patterns

Pant: Generally in India pant is not sewed for baby-girl and but as my daughter is in USA we also know that it is girl but I thought that as it is very cold there we can knit it and hence I tried. This  is first time I worked on circular needle for seamless pant and it turned out very well. I love the pattern and particularly those small pockets.

I am very much thankful to Brynne for such a cute pattern for free. This is the link,

 http://knitty.com/ISSUEsummer05/PATTcargo.html


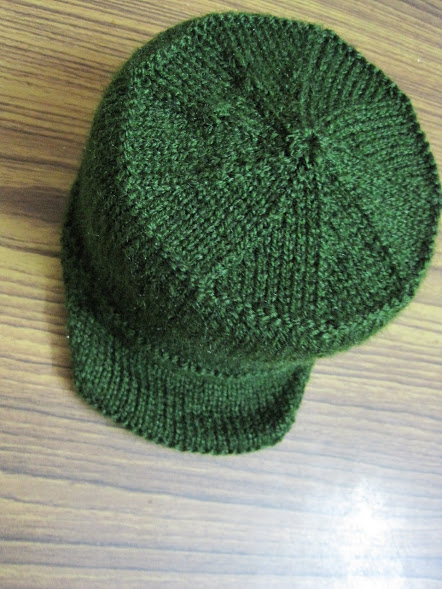
Hat: Till 2011, I have knitted only typical type of cap for small baby as given in my 8 Dec 2017's post. So as soon as I saw this hat I liked it so much and I thought that it will suit with pant hence I knitted it along with this sweater and pant.

I am again thankful to Alice Schnebly  for this wonderful  free pattern,
   
https://www.ravelry.com/patterns/library/kiddie-cadet
Hat with booties
Hat

Booties: Again I have knitted socks but not booties. I like this simple pattern but when I knitted it; it's gauge fails to be accurate and the result is that they are small in size as compare to sweater, pant and hat. A mathematics professor, wrong in proportion 😝! But it's ok, I said, I will make new one and I knitted it.

Forget about the size the first booties but they looked so cute that I used them as show piece in my drawing room 😈

 This is one more thing I should note that wool, Vardhaman in India is quite thin so you should first see the gauge and then decide that how many sts should be cast on. Otherwise all my patterns will be too big to fit your baby.

I am grateful to Mary Jane for this cute booties. Here is the link,

https://lifestyle.howstuffworks.com/crafts/knitting/free-baby-bootie-knitting-patterns2.htm


Tuesday, January 30, 2018

Basic Instruments in Indian Classical Music: 
Part V - Cushion and Rug

Hi friends,
After a long break of 15 days I am back. Within these days we both (me and my husband) enjoyed Kerala - Kanyakumari tour, had seen various places including Munnar, known as God's own country. No need to say that it is very very beautiful. Also met so many new friends enjoyed with them a lot and now back to our art's circle with more energy absorbed from nature. 


Here is the last part in the series of our crochet work, "Basic Instruments in Indian Classical Music". All instruments are done now it is turn of rug and cushion.

In Baithak actually there are three round cushions but I have crocheted only one. One more thing is that rug also which I have crocheted felt short, it should be such that all three instruments with three artists should be accommodated on that rug. So if you are going to make it size should be little bit bigger.
Actual size of the crocheted rug is 40 x 30 cm and
the size of cushion is 10 ch in length.
Vardhman Millennium - Shade No. 10 (Brown)
Vardhman Millennium - Shade No. 24 (Off white)
Vardhman Millennium - Shade No. 113 (Wooden color)


Rug: Start with 52 stitches with wool no 24. Sc 1 in second ch and the sc in each stitch up to last st. Ch 1 turn sc in each st. Repeat till the length is 18 cm. Close.
Change color to shade no. 113 (wooden) and join at the st of any one side of the rug (not at corner). Crochet sc in each st and 3 sc at corner st. Work 6 rounds like this. Close
Join brown color (no 10) at some different place than the previous joint and similarly work for 4 rounds.
Again join shade no 24 at some new place and work 6 rounds with sc in each st and 3 sc in corner stitch.
The rug is ready.

Cushion: Start with shade no 24 and work 20 chains. Ch 1 turn sc on each st. After 3 rows change to shade no 113, wooden color as per photo and work 2 rows then with the third color, shade no 10, work 1 row only. Then again with off-white yarn work 7 rows then with dark brown 1 row and with wooden color 2 rows again. Lastly with white color work 3 rows. A rectangle of 11 x 9 cm is formed. 


Cut the yarn sufficient for sewing and closing one side of the cylinder. Using tapestry needle sew the 9 cm sides with each other. A cylindrical shape is formed. With the same yarn work,
Round 1:  2 sc tog, now there will be 10 sts.
Round 2: Work 2 dc tog.
Pass the yarn through all 5 sts and close.

Stuff the nylon fiber in this cushion lightly. Close other end similar to the first one by rounds 1 and 2.
Here the cushion is ready. If you want you can have two tassels for each cushion.

Make such three cushions for the three instrument player.

Arrange your harmonium, tabla, dagga and tanpura on this rug and cushion as follows and this will be excellent show piece in your guest room / drawing room.


Monday, January 15, 2018

Basic Instruments in Indian Classical Music: 
Part IV - Tanpura
Side view of Tanpura

Tanpura is the string instrument which does not play any song or different melodious group of notes, it is supporting instruments. It only plays Sa, Pa, Pa and Sa; continuously throughout the performance. 
Tanpura actual size: (female) L = 122 cm, W = 40 cm, D = 32 cm
Ready Crochet tanpura with size: L=20 cm, W = 6.3 cm and Diameter= 5.3 cm
First to know the name of each part of the tnpura in order to understand the description, let us have a look at this photo,


Material: Maroon /brown color for Dandi,  Golden color for resonator, light yellow for lower and upper bridge, tailpiece as well as some decorative part, crochet hook no. 11, wire, wooden stick, general needle, 4 small white beads, light ash color thread.

Finger Board / Dandi: With maroon or brown color make 10 ch and sc on each st starting from 2 nd. (thus 9sc) Ch 1 turn. Repeat this till the length becomes 14 cm.
First time I fill it with poly fiber and make complete tanpura but what I saw 😨, the tanpura didn't stand on its own. Thus the whole hard work is in vain. It was bending from the neck of Dandi.
So then I decided to insert a wooden stick in this Dandi. One more advantage of this is; 4 pegs found its holder!  
Front view


Turned the end 
Embroidery on pedals

Peg

Pegs: We make 4 pegs. Two pegs are in the upper portion 1 peg to the left and other to the right portion of the Dandi as shown in the photo.Take a piece of wire 6 cm turn one end to form knot there as shown in figure.With black color wool make a small crochet ball at one end with ch 2, then 3 hdc in second ch sl st in the first to close it.  Insert the knot part of the wire in a small black ball, we just made for peg, wrap the remaining wool to the wire and insert this in the dandi made above in proper place. Then wrap the remaining wire to the wooden stick to fix it. 

Make such 4 pegs and fix them in their places properly.


Resonator: Round 1: With golden color wool, magic ring of 6 sc. Ch 1 turn
Round 2: (sc 2 in the each st) repeat, close.(total 12 sts), ch 1,
Round 3: (sc 1 in each of the next 2 sts,sc 2 in next st), close,(total 16 sts), ch 1 turn,
Round 4: sc 1 in 6 sts, place marker pins at the first and the sixth st here. 1 hdc in the next st, 2 hdc in each of the next 6 sts, 1 hdc in the next st. (total 22 sts), ch 1,
Round 5: sc 1 in each of next 6 sts, (hdc 1 in each of 3 sts, hdc 2 in next) 3 times, hdc 1 in  3sts, (total 25 sts), ch 1,
Round 6: 1 sc in each of next 6 sts, dc 1 in each st, (total 25 sts), close, ch 1,
Round 7:1 sc in each of next 6 sts, (dc 1 in each of 4 sts, dc 2 in next) 3 times, dc 1 in next 4 sts, close, (total 28 sts), ch 1, 
Round 8: sc 1 in each of next 6 sts, hdc on each of 22 sts (total 28 sts). Ch 1 turn. 
Now we work only on 22 sts row wise, leaving 6 starting sts unworked.
Round 9: (sc 1 in each of 4 sts, 2 sc in each of next 3 sts, sc 1 in each of 4 sts) 2 times. (total 28 sts) Ch 1 turn.
Round 10: (sc 1 in 4 sts, 2 sc tog 3 times, sc 1 in 4 sts) 2 times (total 22 sts). Ch 1 turn
Round 11: sc 1 in 6 sts, 2 sc tog 5 times, sc 1 in 6 sts (total 17 sts). Ch 1 turn
Round 12: sc 1 in each of 2 sts, 2dctog 3 times, 1 sc, 2dctog 3 times, sc 1 in each of 2 sts (total 11 sts). ch 1 turn
Round 13: 2 sc tog, sc 1 in 7 sts, 2 sc tog. Bind off 9 sts.

Now we have to extend that dandi to cover the upper portion of resonator. Join the same wool as that of Dandi, to the last row of Dandi, at third chain from starting.

Upper cover of resonator: 
Row 1: sc 5 on 5 sts. Ch 1 turn. Put marker on the middle st of these 5 sts.
Row 2: sc 1 in each of 2 sts, sc 2 in next st, sc 1 in each of 2 sts. (6 sts). ch 1 turn,
Row 3: sc 2 in the first and the last sts, sc 1 on  all other sts. ( 8 sts) Ch 1 turn, 
Row 4: (sc 2 in 1 st and second st), sc 1 in each of next 4 sts, sc 2 in each of the next 2 sts, (12 sts). Ch 1 turn
Row 5: dc 2 in each of next 2 sts, hdc 1 in each of next 8 sts, dc 2 in each of next 2 sts. (16 sts)
Row 6, 7 and 8: sc 1 in the each st (16 sts) Ch 1 turn, 
Row 9; 2sctog, sc 1 in each st till last 2 sts, 2sctog, (14 sts), ch 1 turn
Row 10: As row 9, (12 sts) Ch 1 turn
Row 11: As row 9, (10 sts), ch 1 turn,
Row 12: As row 9, (8 sts), bind off.


Bridges: Upper bridge is worked only by chains with light yellow color.
Lower Bridge: Ch 4
Row 1: Sc 3 starting from second chain. Ch 1 turn
Row 2: Sc 3. Close.
Base of the lower bridge: (Make 2). Ch 3 and work 2 sc starting from second chain.

Tail piece: Ch 4
Row 1: Sc 3 starting from second chain. 
Remember that we have to sew 4 threads to this lower piece as 4 strings of tanpura.
Now by embroidery thread 

Embroidery: With embroidery off white yarn or if you have fine/ thin wool then with that, work front embroidery design as shown in front view of tanpura. Again I have small embroidery work on the two sides of neck band from front facing.

On real tanpura there can be seen beautiful designs on the front side of the resonator by tusk. If I make another piece of tanpura any time surely I will make better design on that. The gaps on the wool base do not allow me to work delicate design any way. 

Sew the upper cover of the resonator with our golden resonator. Also fill a light layer of fiber round the wooden stick and sew the Dandi.   

Five leaves part on back side: First I have tried to make this part separately and attached later on but that doesn't work. So I make it attaching and joining the parts. 
Join the dandi color to the first st where the cover of the resonator is extended. 
Row 1: sc 1 on 4 sts. ch 1 turn,
Row 2: (2 sc in next st, sc 1 in next) twice, (6 sts), ch 1 turn,
Row 3: (2 sc in next st, sc 1 in next) three times, (9 sts). Ch 1 turn,
Row 4: sc 1 in first, (sc 2 in each of next 3 sts, sc 1 in next) 2 times, (15 sts), ch 1 turn,
Row 5: sc 1 in each st, (15 sts), ch 1 turn,
Row 6: sc 1 in each of 3 sts, sc 2 in each of next 2 sts, sc 1 in each of next 2 sts, sc 2 in next st, sc 1 in each of next 2 sts, sc 2 in each of next 2 sts, sc 1 in each of next 3 sts, (20 sts)
Now we shall make five pedals.

Petal 1: 
R1: ch 1, sc 1 in each of the 4 sts, ch 1 turn,
R2: same as row 1, ch 1 turn,
R3: 2sctog 2 times (2 sts) ch 1 turn,
R4: 2sctog (1st), Bind off.
Repeat as in petal 1 and make such 4 more petals.

Fill the resonator by fiber and properly sew this five petal part to close the Tanpura completely. Also sew the five petals maintaining the shape of each pedal. 

Finishing: Then I work a long tail of chains with light yellow color. Sew it to the boarder all over from front side as well as on neck band and where there is upper bridge. Sew the lower bridge base and fix it. Sew the tail piece as seen in the photo. 
Then from lower bridge to tail piece sew 4 lines of single wool for the base of the 4 beads for fine tuning of tanpura. 

Strings: 
I] Take 4 small beads, thread them in a light ash color thread by small needle. Sew its one end at the right corner of the tail piece. (we shall sew one by one from right to left and go on passing string) Slide one bead and be it on the right most yellow yarn (out of 4 yarns we have already sewed in between lower base and tail piece) then let the ash color thread pass on lower bridge from right most position, pass the needle through upper base again from right most position and then join to the peg number 1 ( as in the photo). Twine it to the first peg 3-4 times and cut it properly. 
II] Then again sew the thread with beads to the second right position, slide one bead and be it on the second right yellow yarn then pass through lower base let it go to the peg 2 by passing needle through upper base, as shown in photo. Twine it to the second peg 3-4 times and cut it properly. 
III] Now again sew the beaded thread to the third position of the, slide one bead put it on the yellow yarn then pass the thread through lower base and let it go to the upper most top side position of the peg via upper base. 
IV] Lastly  forth bead in the same manner and twine it to the left most forth peg.

Small embroidery remains to work on those five petals as shown in the photo.

Waah! at last finally it is completed. 
The following video may help you to make this,


Beautiful Crochet Doily or Tablemat as the Ganapati Bappa's Aaasan

                                         Hello friends, How are you all, hope doing good. This beautiful Doily, Tablemat I made specially fo...